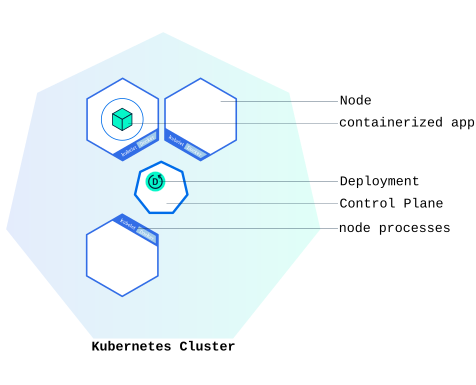
# Using kubectl to Create a Deployment
LLMS index: [llms.txt](/llms.txt)
---
## Objectives
* Learn about application Deployments.
* Deploy your first app on Kubernetes with kubectl.
## Before you begin
The shell commands in this tutorial use POSIX shell syntax, which is supported by
the default shells on most Linux and macOS systems (for example, bash, zsh, or sh).
Windows users must use a POSIX-compatible shell such as
[Windows Subsystem for Linux (WSL)](https://learn.microsoft.com/en-us/windows/wsl/install)
or [Git Bash](https://gitforwindows.org/) to run the commands as written.
Commands that use `export`, `$()`, and similar constructs are **not** compatible
with PowerShell or the Windows Command Prompt.
## Kubernetes Deployments
_A Deployment is responsible for creating and updating instances of your application._
Note
This tutorial uses a container that requires the AMD64 architecture. If you are using
minikube on a computer with a different CPU architecture, you could try using minikube with
a driver that can emulate AMD64. For example, the Docker Desktop driver can do this.
Once you have a [running Kubernetes cluster](/docs/tutorials/kubernetes-basics/create-cluster/cluster-intro/),
you can deploy your containerized applications on top of it. To do so, you create a
Kubernetes **Deployment**. The Deployment instructs Kubernetes how to create and
update instances of your application. Once you've created a Deployment, the Kubernetes
control plane schedules the application instances included in that Deployment to run
on individual Nodes in the cluster.
Once the application instances are created, a Kubernetes Deployment controller continuously
monitors those instances. If the Node hosting an instance goes down or is deleted,
the Deployment controller replaces the instance with an instance on another Node
in the cluster. **This provides a self-healing mechanism to address machine failure
or maintenance.**
In a pre-orchestration world, installation scripts would often be used to start
applications, but they did not allow recovery from machine failure. By both creating
your application instances and keeping them running across Nodes, Kubernetes Deployments
provide a fundamentally different approach to application management.
## Deploying your first app on Kubernetes
_Applications need to be packaged into one of the supported container formats in
order to be deployed on Kubernetes._
You can create and manage a Deployment by using the Kubernetes command line interface,
[kubectl](/docs/reference/kubectl/). `kubectl` uses the Kubernetes API to interact
with the cluster. In this module, you'll learn the most common `kubectl` commands
needed to create Deployments that run your applications on a Kubernetes cluster.
When you create a Deployment, you'll need to specify the container image for your
application and the number of replicas that you want to run. You can change that
information later by updating your Deployment; [Module 5](/docs/tutorials/kubernetes-basics/scale/scale-intro/)
and [Module 6](/docs/tutorials/kubernetes-basics/update/update-intro/) of the bootcamp
discuss how you can scale and update your Deployments.
For your first Deployment, you'll use a hello-node application packaged in a Docker
container that uses NGINX to echo back all the requests. (If you didn't already try
creating a hello-node application and deploying it using a container, you can do
that first by following the instructions from the [Hello Minikube tutorial](/docs/tutorials/hello-minikube/).)
You will need to have installed kubectl as well. If you need to install it, visit
[install tools](/docs/tasks/tools/#kubectl).
Now that you know what Deployments are, let's deploy our first app!
### kubectl basics
The common format of a kubectl command is: `kubectl action resource`.
This performs the specified _action_ (like `create`, `describe` or `delete`) on the
specified _resource_ (like `node` or `deployment`. You can use `--help` after the
subcommand to get additional info about possible parameters (for example: `kubectl get nodes --help`).
Check that kubectl is configured to talk to your cluster, by running the `kubectl version` command.
Check that kubectl is installed and that you can see both the client and the server versions.
To view the nodes in the cluster, run the `kubectl get nodes` command.
You see the available nodes. Later, Kubernetes will choose where to deploy our
application based on Node available resources.
### Deploy an app
Let’s deploy our first app on Kubernetes with the `kubectl create deployment` command.
We need to provide the deployment name and app image location (include the full
repository url for images hosted outside Docker Hub).
```shell
kubectl create deployment kubernetes-bootcamp --image=gcr.io/google-samples/kubernetes-bootcamp:v1
```
Great! You just deployed your first application by creating a deployment. This performed a few things for you:
* searched for a suitable node where an instance of the application could be run (we have only 1 available node)
* scheduled the application to run on that Node
* configured the cluster to reschedule the instance on a new Node when needed
To list your deployments use the `kubectl get deployments` command:
```shell
kubectl get deployments
```
We see that there is 1 deployment running a single instance of your app. The instance
is running inside a container on your node.
### View the app
[Pods](/docs/concepts/workloads/pods/) that are running inside Kubernetes are running
on a private, isolated network. By default they are visible from other pods and services
within the same Kubernetes cluster, but not outside that network. When we use `kubectl`,
we're interacting through an API endpoint to communicate with our application.
We will cover other options on how to expose your application outside the Kubernetes
cluster later, in [Module 4](/docs/tutorials/kubernetes-basics/expose/).
Also as a basic tutorial, we're not explaining what `Pods` are in any
detail here, it will be covered in later topics.
The `kubectl proxy` command can create a proxy that will forward communications
into the cluster-wide, private network. The proxy can be terminated by pressing
control-C and won't show any output while it's running.
**You need to open a second terminal window to run the proxy.**
```shell
kubectl proxy
```
We now have a connection between our host (the terminal) and the Kubernetes cluster.
The proxy enables direct access to the API from these terminals.
You can see all those APIs hosted through the proxy endpoint. For example, we can
query the version directly through the API using the `curl` command:
```shell
curl http://localhost:8001/version
```
Note
If port 8001 is not accessible, ensure that the `kubectl proxy` that you started
above is running in the second terminal.
The API server will automatically create an endpoint for each pod, based on the
pod name, that is also accessible through the proxy.
First we need to get the Pod name, and we'll store it in the environment variable `POD_NAME`.
```shell
export POD_NAME=$(kubectl get pods -o go-template --template '{{range .items}}{{.metadata.name}}{{"\n"}}{{end}}')
echo Name of the Pod: $POD_NAME
```
You can access the Pod through the proxied API, by running:
```shell
curl http://localhost:8001/api/v1/namespaces/default/pods/$POD_NAME:8080/proxy/
```
In order for the new Deployment to be accessible without using the proxy, a Service
is required which will be explained in [Module 4](/docs/tutorials/kubernetes-basics/expose/).
## What's next
* Tutorial [Viewing Pods and Nodes](/docs/tutorials/kubernetes-basics/explore/explore-intro/).
* Learn more about [Deployments](/docs/concepts/workloads/controllers/deployment/).